This page is dedicated to the EBB36/42.
The EBB36/42 Version 1.1 have a fatal flaw in DFU Mode. Please UNPLUG the hotend HEATER or 24V when in DFU.
Generate the Katapult(formerly CanBoot) firmware file
-
clone the Katapult repository to your pi
cd ~/ git clone https://github.com/Arksine/katapult -
run the following
cd katapult make menuconfig -
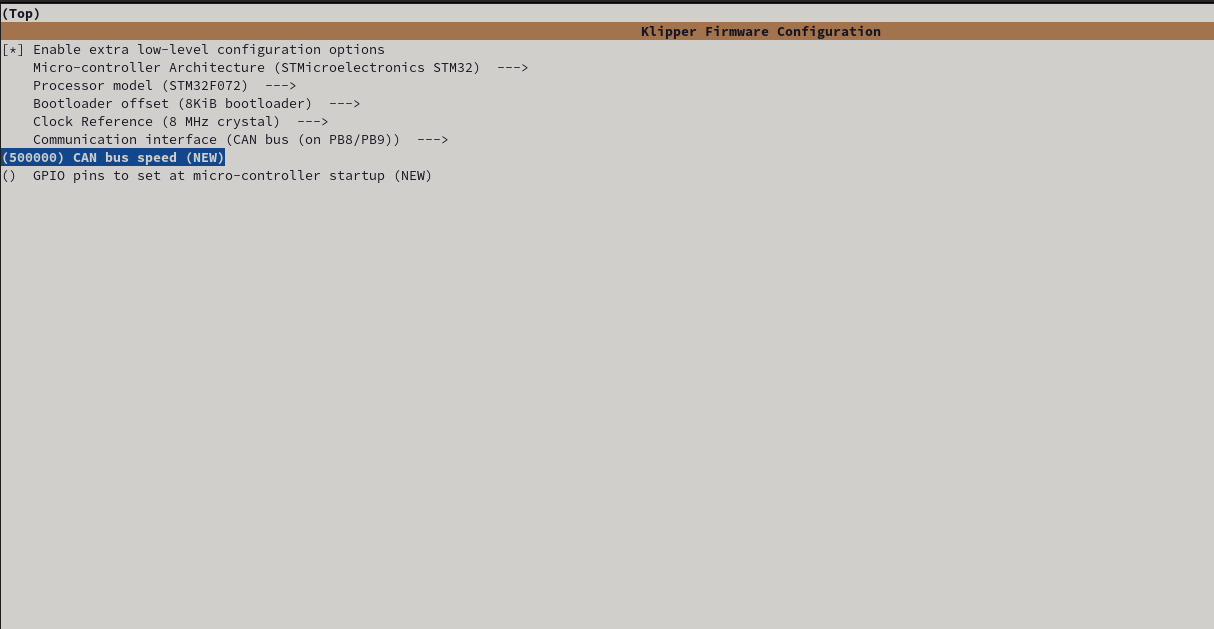
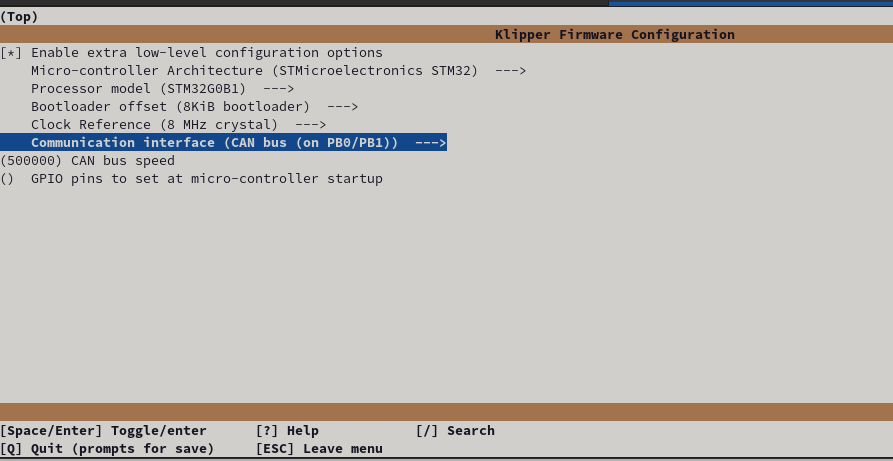
Configure your makefile for the EBB 36 / 42 v1.1/v1.2 with STM32G0B1 choose the corresponding Version of your board below
Firmware Configuration for the EBB36/42 V1.0
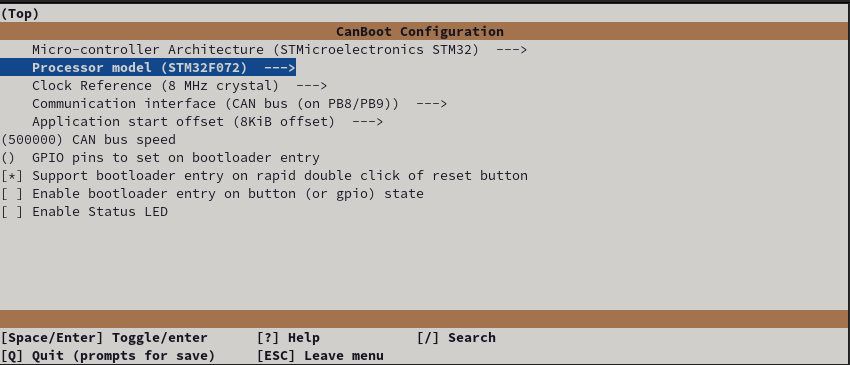 Exit using ESC or Q, confirm with yes(Y)
Firmware Configuration for the EBB36/42 V1.1/2
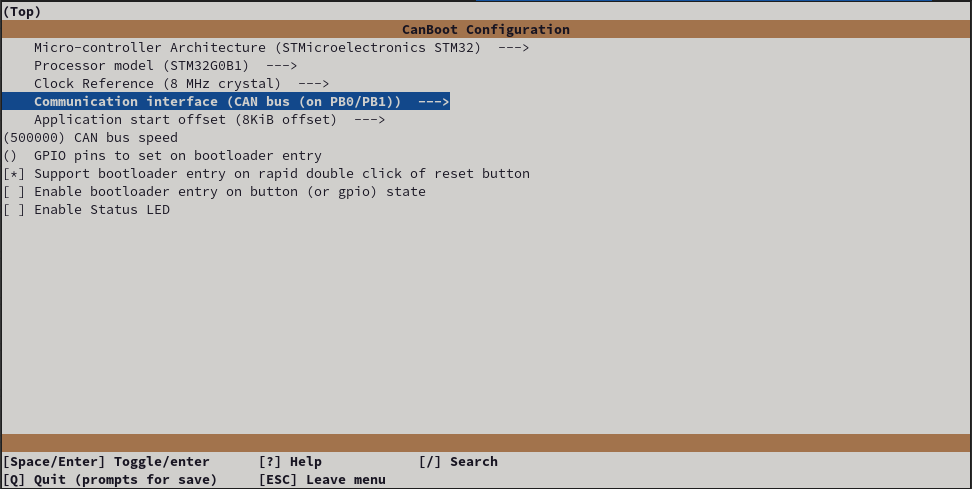 Exit using ESC or Q, confirm with yes(Y)
 -
Build the firmware
make clean

make
Hook up the Board for flashing
The EBB36/42 Version 1.1 have a fatal flaw in DFU Mode. Please UNPLUG the hotend HEATER or 24V when in DFU.
-
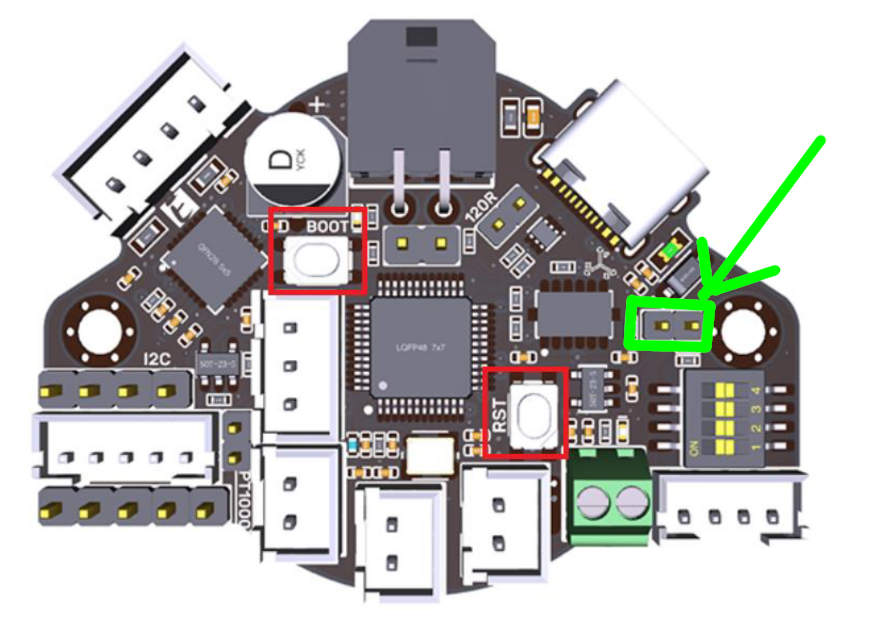
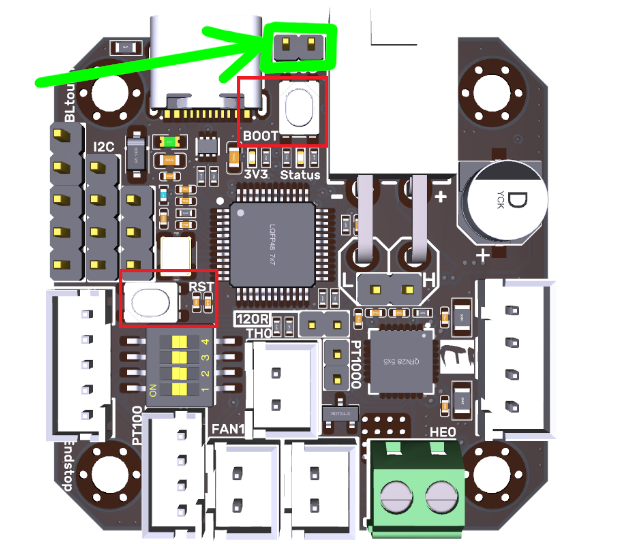
Add the 5v jumper to the pins highlighted below
-
Connect your device to your PI via USB
- Hold the RESET button and BOOT shown above
- Release Reset
- Release Boot
- Verify the device is in bootloader moad by using
lsusb- you should see something like
Bus 001 Device 005: ID 0483:df11 STMicroelectronics STM Device in DFU Mode
- you should see something like
-
Flash the katapult bootloader to the board YOUR DeviceID (0483:df11) may be different CHECK IT! (see step 4)
-
ERASE AND FLASH THE Katapult FIRMWARE
sudo dfu-util -a 0 -D ~/katapult/out/katapult.bin --dfuse-address 0x08000000:force:mass-erase:leave -d 0483:df11


NOTE: If you see an error after the above, don’t worry its fine, provided you have the “File Downloaded Sucessfully” and text above
- Power off the Board, and insert the CANBUS cable
Klipper flashing
If you havent setup your network yet, NOW is your last chance before it becomes a problem, click here, and select your control board for instrutions, then return here and carry on :)
-
You can now power up your printer with the toolhead board attached via the appropriate wiring scheme using the H L 24v and gnd wires.
-
Wait for the device to boot and ensure your CAN0 network is up and you can see the device
~/klippy-env/bin/python ~/klipper/scripts/canbus_query.py can0or
~/katapult/scripts/flash_can.py -i can0 -qYou should see something like
"Found canbus_uuid=XXXXXXXXXX, Application: katapult" -
Assuming the above gave you a UUID you can now flash Klipper to your board via Katapult…
cd ~/klipper
make menuconfig
Firmware Configuration for the EBB36/42 V1.0
Firmware Configuration for the EBB36/42 V1.1/2
Hit Q to exit and select Y to save changes.
make clean
make
You can now flash the board
python3 ~/katapult/scripts/flash_can.py -i can0 -f ~/klipper/out/klipper.bin -u MYUUIDIf all is well you now have a klipper firmware on your EBB36/42.
To verify this you can query the canbus uuid with
~/klippy-env/bin/python ~/klipper/scripts/canbus_query.py can0You should see something like
"Found canbus_uuid=XXXXXXXXXX, Application: Klipper"